- SajanTech's
- Posts
- Building a Scalable UI with React, ABP Framework, and Inertia.js using the MVC Approach
Building a Scalable UI with React, ABP Framework, and Inertia.js using the MVC Approach
Sajankumar Vijayan
February 02, 2025
Intro
In this post, I will walk you through configuring a React UI in an ASP.NET Core web project using the MVC approach.
Previously, I covered how to set up an ABP module from scratch in an ASP.NET Core Web API project. You can read that guide here:
➡️ Integrating ABP Modules in Your ASP.NET Core Web API Project — A Step-by-Step Guide
Building on that setup, I have reused the same ABP configuration to integrate a React UI frontend. To follow along smoothly, I highly recommend reading my previous article first.
Now, let’s dive into the React UI Configuration! 🚀
Note: This is not a UI development post. I assume, you have some basic knowledge using React, typescript and tailwindcss.
Why ABP and React?
Using ABP Framework with React combines the power of a modular, enterprise-grade backend with a fast and flexible frontend.
ABP provides modular architecture, multi-tenancy, authentication, and automatic API generation, making backend development easier.
React offers a component-based UI, high performance, and seamless API integration, making it ideal for building dynamic and scalable applications.
Together, they enable faster development, better maintainability, and a modern tech stack for building enterprise applications efficiently.
Why Inertia.js?
Inertia.js simplifies full-stack development by allowing React to work seamlessly with server-side frameworks like ASP.NET Core with ABP without the need for a separate API. It provides a smooth SPA-like experience while keeping the simplicity of MVC.
Read more about inertiajs and Abp framework Inertiajs: https://inertiajs.com/ ABP Framework: https://abp.io/
Let’s configure the React frontend.
First, create a folder named AbpTodoApp in the same directory as SimpleTodoApp.sln. Then, navigate into the AbpTodoApp folder and run the following command
npm create vite@latest .Follow the on-screen instructions during the installation. Once the installation is complete, your folder structure should look like this:
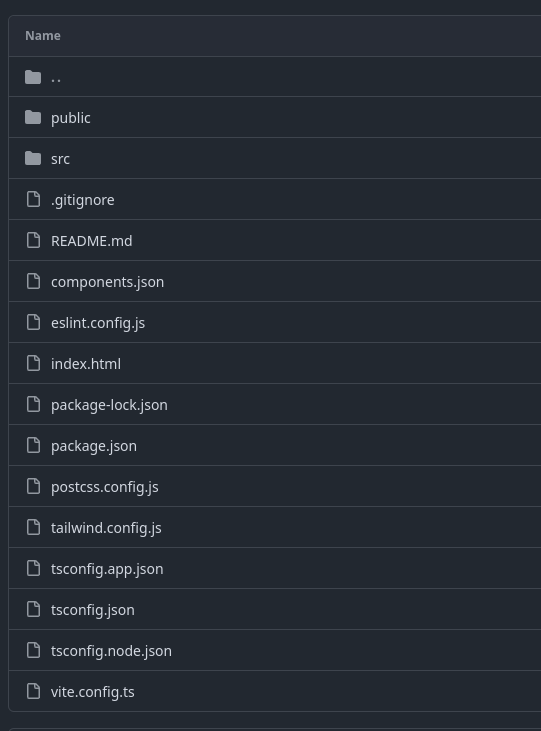
AbpTodoApp React Frontend
Let’s install the Inertia.js dependencies by running the following command:
npm install -D laravel-vite-plugin @inertiajs/react @types/node Now, let's modify our existing vite.config.ts file.
We need to configure Vite to use the laravel-vite-plugin for integrating Inertia.js with React. Additionally, we must specify the build output path to ensure the backend app can process it later. (e.g., wwwroot/build) for production serving.
This step is important for seamless integration.
const outDir = '../SimpleTodoApp/wwwroot/build'
mkdirSync(outDir, { recursive: true })

// https://vite.dev/config/
export default defineConfig({
  plugins: [
    laravel({
      input: ['src/App.tsx'],
      publicDirectory: outDir,
      refresh: true,
    }),
    react()
  ],
  resolve: {
    alias: {
      '@': path.resolve(__dirname, 'src'),
    },
  },
  build: {
    outDir,
    emptyOutDir: true,
  },
})
input: ["src/App.tsx"]: Defines the entry point for the Vite build process, specifying where the application starts.
build.outDir: Sets the output directory for the build, ensuring that compiled assets are stored in wwwroot/build.
Lets modify our entry point file src/App.tsx
import './index.css';
import { createRoot } from "react-dom/client";
import { createInertiaApp } from "@inertiajs/react";
import { resolvePageComponent } from "laravel-vite-plugin/inertia-helpers";
import "./index.css";


const appName = window.document.getElementsByTagName("title")[0]?.innerText || "Inertia";

createInertiaApp({
    title: (title) => `${title} - ${appName}`,
    resolve: (name) => resolvePageComponent(`./Pages/${name}.tsx`, import.meta.glob("./Pages/**/*.tsx")),
    setup({ el, App, props }) {
        const root = createRoot(el);
        root.render(<App {...props} />);
    },
}).catch(console.error);
Break down:
createInertiaApp: Initializes the Inertia.js application and renders components dynamically.resolvePageComponent: Loads page components efficiently using Vite’simport.meta.glob.createRoot(el): Mounts the React component tree using React 18’s API.<App {...props} />: Passes server-side data as props to React components.
This setup connects your Inertia.js React app to the backend, ensuring seamless rendering and data handling.
Let’s create React components inside the Pages folder to define different views for our application.
import Main from "@/layouts/Main.tsx";
import {TodoItem} from "@/interfaces/TodoItem.ts";
import {Card, CardContent, CardHeader, CardTitle} from "@/components/ui/card.tsx";
import AddTodo from "@/components/features/AddTodo.tsx";
import UpdateTodo from "@/components/features/UpdateTodo.tsx";
import DeleteTodo from "@/components/features/DeleteTodo.tsx";


export default function Index(props: { todos: Array<TodoItem> }) {

    return (
        <Main>
            <div className="pt-3">
                <div className="flex justify-end py-2">
                    <AddTodo/>
                </div>
                <Card className="w-full">
                    <CardHeader>
                        <CardTitle className="text-2xl">List of todos</CardTitle>
                    </CardHeader>
                    <CardContent className="space-y-4">
                        {props.todos.length === 0 && (
                            <div className="text-center text-gray-500">
                                No todos found
                            </div>
                        )}
                        {props.todos.map((todo) => (
                            <div
                                key={todo.id}
                                className="flex items-center justify-between border-b border-gray-200 transition ease-in last:border-b-0 py-3 px-2 hover:bg-secondary">
                                <div>
                                    <h2 className="text-lg font-semibold">{todo.title}</h2>
                                    <p>{todo.description}</p>
                                </div>
                                <div className="flex flex-col space-y-3">
                                    <UpdateTodo todo={todo}/>
                                    <DeleteTodo todoId={todo.id}/>
                                </div>
                            </div>

                        ))}
                    </CardContent>
                </Card>
            </div>
        </Main>
    )
}
Note: I’ve added Tailwind CSS and ShadCN UI to enhance the design and improve the overall look.
Feel free to check out the source code here: GitHub Repository 🚀
Error component.
import {Card, CardContent} from "@/components/ui/card.tsx";
import Main from "@/layouts/Main.tsx";

export default function Error(props: { message: string, code: number }) {
    const {message, code} = props;
    return (
        <Main>
            <div className="pt-5">
                <Card>
                    <CardContent className="p-5">
                        <div className="text-center text-red-500">
                            <h1 className="text-3xl font-semibold">Error: {code}</h1>
                            <p className="text-lg">{message ?? "An error occurred while processing your request."}</p>
                        </div>
                    </CardContent>
                </Card>
            </div>
        </Main>
    )
}
Also, create AddTodo, UpdateTodo and DeleteTodo components
import {Button} from "@/components/ui/button.tsx";
import {
    Dialog,
    DialogContent,
    DialogDescription,
    DialogFooter,
    DialogHeader,
    DialogTitle,
    DialogTrigger,
} from "@/components/ui/dialog"
import {Input} from "@/components/ui/input"
import {Label} from "@/components/ui/label"
import {Textarea} from "@/components/ui/textarea.tsx";

export default function AddTodo() {

    return (
        <Dialog>
            <DialogTrigger asChild>
                <Button>
                    + Add todo
                </Button>
            </DialogTrigger>
            <DialogContent className="sm:max-w-screen-sm">
                <DialogHeader>
                    <DialogTitle>Create a todo item</DialogTitle>
                    <DialogDescription>
                        Add a new todo item to the list
                    </DialogDescription>
                </DialogHeader>
                <form method="post" action={"/create"}>
                    <span className="hidden" dangerouslySetInnerHTML={{__html: window.__RequestVerificationToken}}></span>
                    <div className="grid gap-4 py-4">
                        <div className="grid grid-cols-4 items-center gap-4">
                            <Label htmlFor="name" className="text-right">
                                Title
                            </Label>
                            <Input id="title" placeholder="Learn ABP framework" name="title" className="col-span-3"/>
                        </div>
                        <div className="grid grid-cols-4 items-center gap-4">
                            <Label htmlFor="username" className="text-right">
                                Description
                            </Label>
                            <Textarea id="description" className="col-span-3" name="description" />
                        </div>
                    </div>
                    <DialogFooter>
                        <Button type="submit">Save</Button>
                    </DialogFooter>
                </form>
            </DialogContent>
        </Dialog>

    )
}
import {Checkbox} from "@/components/ui/checkbox.tsx";
import {useRef, useState} from "react";
import {TodoItem} from "@/interfaces/TodoItem.ts";
export default function UpdateTodo(props: { todo: TodoItem }) {
const formRef = useRef<HTMLFormElement | null>(null);
const {todo} = props;
const [isCompleted, setIsCompleted] = useState<boolean>(todo.isCompleted);
return (
<form key={todo.id} method="post" action={`/update/${todo.id}`} ref={formRef}>
<span className="hidden" dangerouslySetInnerHTML={{__html: window.__RequestVerificationToken}}></span>
<div className="flex items-center space-x-2">
<input type="hidden" name="isCompleted" value={isCompleted.toString()} />
<Checkbox id={`completed_${todo.id}`}
defaultValue={todo.isCompleted ? 1 : 0}
checked={isCompleted}
type="submit"
onCheckedChange={(checked) => {
console.log(checked);
if (formRef.current) {
setIsCompleted(checked as boolean);
}
}}/>
<label
htmlFor={`completed_${todo.id}`}
className="text-sm font-medium leading-none peer-disabled:cursor-not-allowed peer-disabled:opacity-70"
>
Mark as completed
</label>
</div>
</form>
)
}import {Button} from "@/components/ui/button.tsx";
export default function DeleteTodo(props: {todoId: number}) {
const { todoId } = props;
return (
<form method="post" action={`/delete/${todoId}`}>
<span className="hidden" dangerouslySetInnerHTML={{__html: window.__RequestVerificationToken}}></span>
<Button variant="destructive" type="submit">
Delete
</Button>
</form>
)
} Finally, we need to define APP_URL in the .env file. This should point to your backend's development server and is essential for Vite to correctly link the frontend with the backend during development.
APP_URL=https://localhost:7287Now, let’s configure Inertia.js in our backend.
There’s a great ASP.NET Core extension library for Inertia.js, which you can check out here:
🔗 InertiaCore GitHub Repository
To install it from the NuGet repository, run the following command:
dotnet add package AspNetCore.InertiaCoreThis package handles Inertia.js initialization and provides Vite helpers along with the necessary middleware to seamlessly integrate Inertia.js into the ASP.NET Core pipeline.
Let’s update the ApiModule.cs file by adding the necessary service extension inside the ConfigureServices method.
context.Services.AddInertia(i =>
{
    i.RootView = "~/Views/Home/Index.cshtml";

});
context.Services.AddViteHelper(vh =>
{
    vh.PublicDirectory = "wwwroot";
    vh.ManifestFilename = "manifest.json";
    vh.BuildDirectory = "build";
});
And, attach the middleware in the AspNetCore pipeline
app.UseInertia();Break down:
AddInertia: Registers Inertia.js and sets the root view (e.g.,Index.cshtml).AddViteHelper: Ensures proper handling of Vite-built assets.
This setup enables AspNetCore to integrate Inertia.js and serve assets from wwwroot.
Lets define our controller and Views
First create a HomeController.cs inside the controller folder
using InertiaCore;
using Microsoft.AspNetCore.Mvc;
using SimpleTodoApp.Entities;
using SimpleTodoApp.Services;
using SimpleTodoApp.Services.Dtos;

namespace SimpleTodoApp.controllers;

public class HomeController(ItemService todoItem, ILogger<HomeController> logger) : Controller
{
    public async Task<IActionResult> Index()
    {
        var todos = await todoItem.GetTodoItems();
        return  Inertia.Render("Index",new { name = "John Doe", todos });
    }

    [HttpPost("/create"), ValidateAntiForgeryToken]
    public async Task<IActionResult> Create([FromForm] CreateTodo todo)
    {

        await todoItem.CreateTodoItem(new Todo
        {
            Title = todo.Title,
            Description = todo.Description,
        });

        return RedirectToAction("Index");
    }

    [HttpPost("/update/{id}"), ValidateAntiForgeryToken]
    public async Task<IActionResult> Update(string id, [FromForm] UpdateTodo todo)
    {
       var existingTodo = await todoItem.GetTodoItem(Guid.Parse(id));
            existingTodo.IsCompleted = todo.IsCompleted;
       await todoItem.UpdateTodoItem(existingTodo);
        return RedirectToAction("Index");
    }

    [HttpPost("/delete/{id}"), ValidateAntiForgeryToken]
    public async Task<IActionResult> Update(string id)
    {
        await todoItem.DeleteTodoItem(Guid.Parse(id));
        return RedirectToAction("Index");
    }
}
Break down
This HomeController handles Inertia.js integration with ASP.NET Core, managing CRUD operations for a Todo App using an ItemService.
Index()(GET) – Fetches all todo items and renders theIndexpage using Inertia.js, passing anameand thetodoslist.Create()(POST) – Adds a new todo item using data from a form, then redirects to theIndexpage.Update()(POST) – Updates the completion status of an existing todo item and redirects toIndex.Delete()(POST) – Deletes a todo item based on itsidand redirects toIndex.
Note: Security — Implements Anti-Forgery Token validation. We need to set this in the React form when submitting. To do that, we need to expose the input element via window.__RequestVerificationToken
Lets create our view Index.cshtml inside Views/Home folder
@using InertiaCore
@using InertiaCore.Utils

@{
    Layout = null;
}

<!DOCTYPE html>

<html>
<head>
    <title></title>
    @await Inertia.Head(Model)
</head>
<body>
<div>
    @Vite.ReactRefresh() @await Inertia.Html(Model) @Vite.Input("src/App.tsx")
</div>

@{
    var token = Html.AntiForgeryToken();
}
<script>
    window.onload = function () {
        window.__RequestVerificationToken = '@token'
    };
</script>
</body>
</html>
Break down:
@using InertiaCore&@using InertiaCore.Utils– Imports Inertia.js helpers for ASP.NET Core.Layout = null;– Disables default layout rendering for a clean SPA setup.@await Inertia.Head(Model)– Injects dynamic metadata for Inertia pages.@Vite.ReactRefresh()– Enables React Fast Refresh for better DX in development.@await Inertia.Html(Model)– Renders the Inertia.js app component dynamically.@Vite.Input("src/App.tsx")– Specifies the React entry point for Vite bundling.Anti-Forgery Token (
Html.AntiForgeryToken()) – Generates a CSRF token for secure form submissions.JavaScript Token Injection — Stores the CSRF token globally (
window.__RequestVerificationToken) for use when submitting the form.
This setup ensures a seamless integration of Inertia.js, Vite, and React within an ASP.NET Core MVC application.
Note: Add this window.__RequestVerificationToken types in the App.tsx file to avoid typescript error and inject this element as follows:
<span className="hidden" dangerouslySetInnerHTML={{__html: window.__RequestVerificationToken}}></span>declare global {
interface Window {
__RequestVerificationToken: string;
}
}Last setup we have to tell AspNetCore where to find the client spa application
Update SimpleTodoApp.csproj file
    <PropertyGroup>
        <TargetFramework>net9.0</TargetFramework>
        <Nullable>enable</Nullable>
        <ImplicitUsings>enable</ImplicitUsings>
        <SpaRoot>..\AbpTodoApp\</SpaRoot>
        <DefaultItemExcludes>$(DefaultItemExcludes);$(SpaRoot)node_modules\**</DefaultItemExcludes>
    </PropertyGroup>


    <Target Name="PublishRunWebpack" AfterTargets="ComputeFilesToPublish">
        <!-- As part of publishing, ensure the JS resources are freshly built in production mode -->
        <Exec WorkingDirectory="$(SpaRoot)" Command="npm install" />
        <Exec WorkingDirectory="$(SpaRoot)" Command="npm run build" />

        <!-- Include the newly-built files in the publish output -->
        <ItemGroup>
            <DistFiles Include="$(SpaRoot)build\**" />
            <ResolvedFileToPublish Include="@(DistFiles->'%(FullPath)')" Exclude="@(ResolvedFileToPublish)">
                <RelativePath>wwwroot\%(RecursiveDir)%(FileName)%(Extension)</RelativePath>
                <CopyToPublishDirectory>PreserveNewest</CopyToPublishDirectory>
                <ExcludeFromSingleFile>true</ExcludeFromSingleFile>
            </ResolvedFileToPublish>
        </ItemGroup>
    </Target>
Break down:SpaRoot: Specifies the root directory of the frontend application (..\AbpTodoApp\).
DefaultItemExcludes: Excludes thenode_modulesfolder from the build and publish process, preventing unnecessary files from being included.PublishRunWebpack: A custom target that executesnpm installandnpm run buildduring the publish process to generate production-ready frontend assets.
This configuration ensures that the AspNetCore Web project properly integrates the frontend, including all necessary assets during build and deployment.
Finally, you can run both the backend and frontend together and access your application at https://localhost:7287.
With this setup, you now have a fully functional MVC-based application using React and ASP.NET Core, powered by the ABP Framework for a scalable and modular architecture. 🚀
Conclusion:
By integrating React, Inertia.js, and ASP.NET Core with the ABP Framework, we have successfully built a modern, modular, and scalable web application using the MVC approach. This setup allows us to leverage ABP’s powerful backend capabilities while maintaining a dynamic, single page experience with React.
Feel free to check out the source code here: GitHub Repository 🚀
Takeaways:
✅ Seamless Full-Stack Development — No need for a separate API, thanks to Inertia.js.
✅ ABP Framework Integration — Provides modular architecture, authentication, and multi-tenancy.
✅ Vite + React Setup — Ensures fast builds and optimized frontend performance.
With this foundation, you now have a fully functional MVC style application that balances backend efficiency and frontend interactivity. Feel free to explore, extend, and optimize the application further! 🚀
If you found this post helpful and want to learn more about building modern, scalable, and efficient applications, make sure to follow me! I regularly share tips, tutorials, and deep dives into frameworks like ABP, ASP.NET Core, Nestjs and frontend developments.
Subscribing to my blog will keep you updated with the latest content, practical advice, and tools to elevate your development skills. Don’t miss out on staying ahead in the ever-evolving world of software development hit that follow button and subscribe now! Let’s build amazing things together. 🚀
Reply